Are you ready to start your first hiking adventure? If you’re a beginner hiker, you’re in for some amazing experiences!
Did you know that hiking can burn up to 440 calories per hour? That’s right – not only is it a great way to connect with nature, but it’s also fantastic for your physical and mental health.
But before you hit the trails, let’s make sure you’re properly equipped.
As someone who’s enjoyed many miles on the trails, I can tell you that having the right hiking equipment can make or break your experience.
Don’t worry, though – we’ve got you covered with this ultimate beginner hiking gear checklist.
Let’s dive in and get you ready for the trails!
What are the Essentials for your beginner hiking gear checklist?
So what are the ten essentials for hiking? These aren’t just some random items that experienced hikers carry to look cool – they’re literally your lifeline out there in the wilderness.
Trust me, you don’t want to hit the trail without them.
1. Navigation

This one’s a no-brainer. You need a map and compass, and yeah, your phone’s GPS is great until it isn’t. I often carry a physical map now, even if it makes me feel like an old-school explorer.
You don’t need a fancy GPS right off the bat. Start with a good old-fashioned map and compass. You can pick up a decent compass for about $15, and most trail maps are under $10.
Pro tip: learn to use them before you hit the trail!
2. Sun protection
Sunburn is the worst. Period. Especially if you’re a bald guy like me!
Sunscreen, sunglasses, and a hat should be some of the top items on your gear list. I once forgot my hat and, believe me, my bare scalp did not appreciate it.
Dollar stores can be your friend here. You can find perfectly good sunscreen, sunglasses, and hats for just a few bucks each. They might not be the fanciest, but they get the job done in a pinch. Just make sure the sunscreen isn’t expired!
3. Insulation
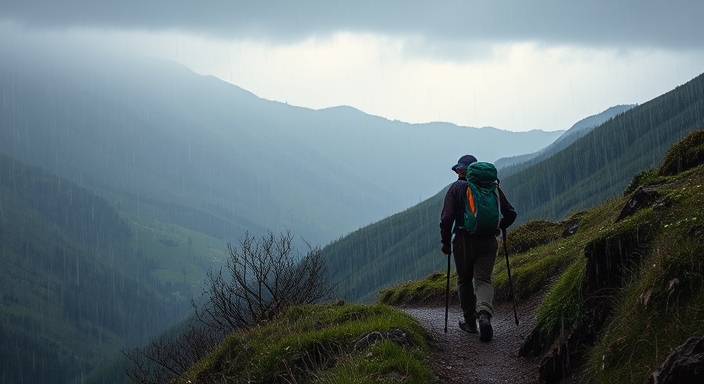
Weather can change faster than you’d think. An extra layer, like a lightweight fleece or jacket, can be a real lifesaver. I’ve been caught in sudden downpours and I don’t advise it!
Thrift stores can be a goldmine for fleece jackets and other warm layers.
4. Illumination

A headlamp or flashlight is crucial! Trust me, trying to navigate a rocky trail in the dark with your phone’s flashlight doesn’t work. Also, make sure you have extra batteries or a charge available as backup.
You can find decent headlamps for online at Amazon, REI, or at big box stores. I started with a $20 one from our family junk drawer, but it came in handy more than once.
5. First-aid supplies
You don’t need to carry a whole hospital, but some basic supplies can make a big difference. Bandages, antiseptic wipes, and pain relievers are go-to items.
Build your own kit instead of buying a pre-made one. It’s cheaper and you can customize it. Use a small ziplock bag and stock it with basics from the dollar store. Band-aids, antiseptic wipes, and pain relievers don’t need to be fancy to work.
6. Fire
Waterproof matches or a lighter can be real lifesavers!
A simple lighter and some dryer lint in a small plastic bag is all you need here.
Total cost? Practically nothing.
7. Repair kit and tools

A multi-tool and some duct tape can fix almost anything. You can use duct tape to patch up backpacks, hiking shoes, and even tents.
A basic multi-tool can be found for under $15. Pair it with a roll of duct tape and you’re set. You can fix so many things with this combo, from torn backpacks to broken trekking poles.
8. Nutrition

Always pack more food than you think you’ll need! Energy bars, nuts, and dried fruit are my trail staples. I learned this lesson after rationing a single granola bar over 6 hours when a short hike turned into an all-day adventure.
You can skip the expensive hiking-specific snacks if you buy nuts, dried fruit, and granola in bulk and make your own trail mix. It’s way cheaper and you can customize it to your own taste.
No more picking out the raisins!
9. Hydration

Water is life, especially on the trail!
Always carry more than you think you’ll need, plus a way to purify water if you run out. A water filter or purification tablets are worth their weight in gold.
A basic reusable water bottle works fine to start, but you should also consider a hydration pack to carry more fluid on longer hikes.
For water purification, iodine tablets are super cheap – about $5 for enough to purify 25 liters of water.
10. Emergency shelter

A lightweight emergency blanket or bivy sack doesn’t weigh much, but it could save your life if you’re stuck overnight. It’s something you hope you never need, but it can give you peace of mind knowing you have it.
A basic emergency blanket (often called a space blanket) can cost as little as $3. It’s not the most comfortable thing to sleep in, but it could save your life in an emergency.
Do you really need ALL of this stuff?
The answer is yes, yes you do. Even on short day hikes. Because here’s the thing: nature is unpredictable, and so are we humans. You might take a wrong turn, twist an ankle, or just lose track of time watching that gorgeous sunset.
Having these 10 hiking essentials in your packing list doesn’t mean you’re paranoid – it means you’re prepared. And in the backcountry, being prepared can make the difference between a great story to tell your friends and a rescue helicopter coming to find you.
Remember, you don’t need top-of-the-line gear to start hiking safely. Focus on getting your essential hiking gear with budget options first. You can always upgrade later as you get more into hiking and figure out what features matter most to you.
The most important thing is to have these essentials with you, not how much they cost. So don’t let a tight budget keep you from hitting the trails.
Get creative, shop sales, and remember – the best gear is the gear that gets you outdoors!
Choosing the Right Hiking Footwear

Here’s the deal: your feet are your most important tool when it comes to hiking. They’re carrying you and all your gear over rough terrain for hours on end. Treat them right, and they’ll take you to amazing places. Treat them wrong, and you’ll be hobbling back to the trailhead before you know it.
Proper hiking boots or hiking shoes aren’t just about comfort (though that’s a big part of it). They’re about safety too.
Good hiking footwear gives you traction on slippery surfaces, protects your ankles from rolls and sprains, and shields your feet from sharp rocks and roots. Trust me, stubbing your toe on a hidden rock is no fun – especially when you’re miles from the nearest band-aid.
So, what should you look for in beginner-friendly hiking footwear?
1. Ankle support
High-top boots provide essential ankle support, especially on uneven terrain.
2. Waterproofing
Waterproof materials like Gore-Tex prevent soggy feet and discomfort.
3. Traction
Shoes with deep, multi-directional lugs offer better grip and prevent slips
4. Durability
Reinforced toe caps and sturdy materials enhance longevity.
5. Comfort
This might seem obvious, but it’s so important. Your shoes should fit well right out of the box.
Don’t count on “breaking them in” – that’s a recipe for blisters.
Now, I know some of the best hiking boots out there can cost a small fortune. But don’t worry – there are plenty of affordable options that’ll keep your feet happy on the trail.
Recommended Beginner Footwear:
- Merrell Moab 2 Vent: Comfortable with good ankle support, usually under $100.
- Columbia Newton Ridge Plus II: Affordable, waterproof, and durable.
- Keen Targhee II: Slightly pricier but excellent for comfort and wider feet.
Remember, the “best” shoe is the one that fits your foot and your needs. Don’t be afraid to try on a bunch of different pairs. Walk around the store, go up and down stairs if you can. Your feet will thank you when you’re 5 miles into a hike and still feeling good.
Oh, and one last tip: wear proper hiking socks! They make a world of difference.
I used to think socks were socks, but a good pair of moisture-wicking hiking socks can prevent blisters and keep your feet dry. It’s an extra expense, but trust me, it’s worth every penny.
Choosing the right hiking footwear might seem overwhelming at first, but it’s worth taking the time to get it right. Your feet are gonna carry you to some amazing places – make sure they’re well-equipped for the journey!
Dressing for Success: Hiking Clothing Basics

When many people start exploring hiking trails, they think their regular gym clothes will do the trick. Unfortunately they’re in for an uncomfortable surprise!
Let me share what I’ve learned about hiking clothes over the years.
First up, layering is the secret sauce of hiking comfort. Think of it as a clothing onion – you want layers you can peel off or put back on as needed. I can’t tell you how many times I’ve started a hike shivering, only to be stripping off layers halfway up the mountain.
Here’s how I break it down:
1. Base layer: This is your sweat-wicking superhero. It sits right against your skin.
2. Mid layer: Your insulation buddy. Keeps you warm when it’s chilly.
3. Outer layer: The shield against wind and rain.
Now, let’s talk about what to wear in different weather conditions. Trust me, I’ve hiked in everything from scorching heat to frigid snowstorms!
Weather-specific clothing:
- Hot Weather: Lightweight shorts or pants, a light-colored shirt, wide-brimmed hat, and breathable socks.
- Cold Weather: Thermal base layers, insulated jacket, warm hat, gloves, and thick socks.
- Rainy Weather: Waterproof jacket and pants, quick-drying base layers, waterproof boots, and extra socks.
Quick-drying fabrics:
Moisture-wicking and quick-drying materials are game-changers. I remember my first hike in a cotton t-shirt – I was a sweaty, chafed mess by the end. Never again!
Moisture-wicking fabrics pull sweat away from your skin to the outer layer of the clothing where it can evaporate. It’s like magic!
Look for synthetic materials like polyester or nylon. They might feel a bit weird at first if you’re used to cotton, but you’ll thank me when you’re not sitting in a puddle of your own sweat halfway up the trail.
Quick-drying fabrics are your best friend when you get caught in a sudden downpour or if you’re a heavy sweater like me. They dry super fast, which helps prevent chafing and keeps you comfortable.
Plus, it means you can wash your hiking clothes in a stream and wear them again the next day on multi-day trips.
Some of my favorite moisture-wicking and quick-drying fabrics are:
- Merino wool (great for base layers, doesn’t stink even after days of wear)
- Polyester (cheap and effective)
- Nylon (super durable)
- Bamboo (eco-friendly option)
One last tip: don’t forget to dress for the “what-ifs”. I suggest packing a lightweight warm layer and a rain jacket, even on sunny days. Weather can change fast in the mountains, and it’s important to be prepared.
Remember, the goal is to stay comfortable so you can enjoy the hike. It might take some trial and error to figure out what works best for you, but that’s part of the fun!
And hey, if you end up looking a little goofy in your high-tech hiking outfit, who cares? The trees won’t judge, and you’ll be too busy enjoying the view to worry about it anyway!
Hydration and Nutrition: Fueling Your Hike

Alright, let’s talk about staying fueled and hydrated on a hike. First off, choosing the right water bottle or hydration system is key. I love using a hydration bladder like the CamelBak – it fits right into your backpack and has a handy tube for sipping while you walk. For shorter hikes, a good insulated water bottle like a Hydro Flask keeps your water cool.
How much water should you bring? Here are some general rules, but you should adjust accordingly depending on the weather.
- For short hikes (1-2 hours), a liter should be enough.
- For half-day hikes, bring 1.5 to 2 liters.
- For a full day, aim for at least 3 liters.
And always bring those electrolyte tablets or powders to replenish lost minerals and prevent cramps.
Now, onto nutrition!
- Start your day with a hearty breakfast;
- During the hike, snack regularly to keep your energy up.
- Easy, nutritious snacks include trail mix (almonds, cashews, dried cranberries, and dark chocolate chunks), granola bars, and whole grain crackers.
- Carbs are essential, so pack some PB&J sandwiches.
- Protein helps with muscle recovery; jerky, nuts, and cheese sticks are good options.
Remember food safety: in bear country, store your food in bear-proof containers or use a bear bag. I learned this after a raccoon raided my snacks while I was hiking in Costa Rica.
Stay hydrated, snack smartly, and your body will thank you, making your hike more enjoyable.
Navigation Tools for Newbie Hikers
Alright, let’s dive into one of the most crucial aspects of hiking: navigation.
When you’re new to hiking, mastering basic map and compass skills can make a world of difference. A compass paired with a topographic map is your best friend.
Learn to orient your map, identify landmarks, and understand contour lines. It might sound old-school, but it’s reliable and doesn’t depend on batteries.
For those just starting out, a beginner-friendly GPS device can be a game-changer. The Garmin eTrex series is solid, with user-friendly features and reliable signal.

If you prefer using your smartphone, apps like AllTrails or Gaia GPS are excellent. They offer downloadable maps, trail information, and GPS tracking, which can be incredibly reassuring on unfamiliar trails. Just remember to download your maps before heading out, as cell service can be spotty in remote areas.
Now, while digital tools are fantastic, always carry a physical map as a backup. Batteries die, devices malfunction, and signals get lost. A paper map doesn’t fail. It’s also a great way to truly connect with the trail and understand your surroundings.
In summary, learn the basics of map and compass navigation, invest in a good GPS device or smartphone app, but always have a physical map as your backup.
Happy hiking, and may you never get lost!
First Aid and Emergency Preparedness

Alright, let’s dive into first aid and emergency preparedness for hiking. It’s one of those things you hope you never need, but when you do, you’ll be so glad you’re prepared.
First up, let’s talk about essential items for a basic hiking first aid kit.
Always pack adhesive bandages, antiseptic wipes, gauze pads, medical tape, tweezers, and a small pair of scissors. Add in some blister treatment like moleskin, as blisters can turn a fun hike into a painful ordeal fast. I also throw in a few pain relievers, antihistamines, and any personal medications you might need.
Next, let’s discuss emergency shelter options. These can be literal lifesavers. An emergency blanket is super lightweight and compact, but it provides vital warmth by reflecting your body heat. For longer hikes, consider a lightweight tent or an emergency bivy. They’re a bit bulkier but offer more protection.
Carrying emergency contact information is also crucial. I recommend writing your name, emergency contacts, any medical conditions, and allergies on a card and keeping it in a waterproof bag in an easily accessible pocket of your backpack.
You can also use apps like Road ID, which create digital emergency contact cards that first responders can access even if your phone is locked.
To recap, always carry a well-stocked first aid kit, pack an emergency blanket and other shelter options, and have your emergency contact information handy.
Being prepared doesn’t just keep you safe; it gives you peace of mind to fully enjoy your hiking adventure. Stay safe out there!
Backpacks: Carrying Your Gear Comfortably

Let’s look at one of the most essential pieces of hiking gear: your backpack.
For a beginner hiker, choosing the right size daypack is crucial. A 20-30 liter pack is typically ideal for day hikes, holding your water, snacks, a first aid kit, an extra layer, and small items.
Important features to look for in a hiking backpack include:
- Comfort (padded shoulder straps and a hip belt)
- Ventilation (a mesh back panel to prevent a sweaty back)
- Accessibility (pockets and compartments for organization).
Hydration compatibility, like a sleeve for a hydration bladder, is also a big plus.
Properly packing and adjusting your backpack can make a huge difference in comfort.
- 1. Pack the heaviest items close to your back and centered between your shoulders to keep the weight balanced.
- 2. Place lighter items further out and use compartments for frequently used items like snacks, maps, and sunscreen.
- 3. Adjust the shoulder straps so the pack sits snugly against your back, then tighten the hip belt to transfer some weight to your hips.
- 4. Load lifters at the top of the shoulder straps help keep the pack close to your body.
Trust me, getting this right can make all the difference on your next hiking trip.
Conclusion
There you have it, fellow adventure-seekers – your comprehensive beginner hiking gear checklist! With these essentials in your pack, you’re all set to hit the trails and go hiking with confidence.
Remember, you don’t need to break the bank to get started. Focus on the must-haves first, and you can always upgrade as you gain more experience. The most important thing is to get out there and start exploring!
So, what are you waiting for? Gear up, step out, and let the trails lead you into a world of natural wonders.
To learn more, make sure to check out our Ultimate Guide to Hiking for Beginners.
Happy hiking, and I’ll see you on the trails!